An online electronics store owner developed his business and had customers from around the globe. However, with the increase in sales, the number of return requests also started to mount.
Managing these returns soon became a logistical nightmare that consumed his time and resources. Then, he knew he needed a robust software solution to simplify this complex process and bring transparency to his operations.
Many other entrepreneurs are in similar predicaments, struggling to handle returns efficiently. It is here that platforms like NetSuite Return Authorization help ease the problem.
This software is designed to streamline the return process and prevent backlog in the warehouse, ultimately making returns management less taxing and more efficient.
Note: At the end of the article, we have discussed common issues businesses face while dealing with returned items.
In this blog post, we will look into the workflow of NetSuite return authorization, its importance, and its benefits.
What is NetSuite’s Return Authorization?
NetSuite Return Authorization, also known as Return Material Authorization(RMA), is a feature of the NetSuite ERP system that helps businesses manage and streamline their return processes.
It allows businesses to record information about an expected return of items from a customer, including details such as the item number, quantity, and price to be refunded.
Why is RMA (Return Material Authorization) Essential?
It is essential for the following reasons: It helps to
- Track return items
- Keeping inventory levels accurate
- Process refunds quickly and efficiently
- Avoid fraud
- Improve customer satisfaction
NetSuite has two separate return authorization records, and it helps to know which one you need before you start. A customer return authorization (RMA) handles goods a customer sends back to you. A vendor return authorization (VRA) handles stock you send back to the supplier you bought it from. Both are non-posting records that get a unique return number, but they move in opposite directions and settle through different transactions.
| Customer return authorization (RMA) | Vendor return authorization (VRA) | |
| Direction of goods | Customer returns to you | You return to the vendor |
| Receiving transaction | Item Receipt (stock comes back in) | Item Fulfillment (stock ships out) |
| Financial settlement | Credit Memo or Cash Refund to the customer | Vendor Credit or refund from the vendor |
| Typical trigger | Damaged, wrong, or unwanted item | Defective, over-shipped, or recalled stock |
How does NetSuite’s Return Authorization Work?
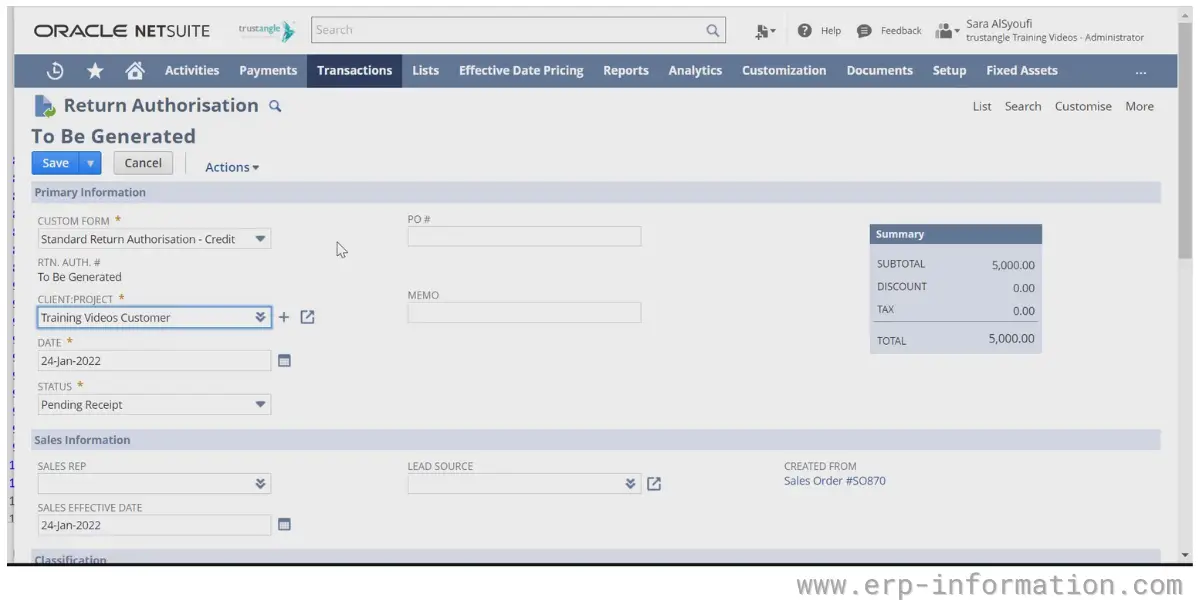
The process begins with creating a return authorization form, the first step in returning items in NetSuite.
A staff member creates the return authorization inside NetSuite. It is usually generated from the original sales order, invoice, or cash sale, so the item number, quantity, and price fill in automatically. If you run a SuiteCommerce web store, an approved online return request can feed straight into the same record.
Once the form is submitted, a representative will review it and contact the customer in case of queries. If everything looks good, they’ll issue a Return Authorization Number (RAN).
RMA NetSuite (Return Material Authorization) number is crucial for tracking the return process, identifying the items, and executing the following steps, such as inspecting returned goods, updating inventory quantities and values, and issuing refunds.
All these steps can be tracked and managed within NetSuite, making the return process more efficient and transparent for both the business and the customer.
What is the Return Authorization Number?
A return authorization number is like a code. The seller gives them this number when someone wants to return a product they bought. It helps the seller track who is replacing the product and ensure they get their money back.
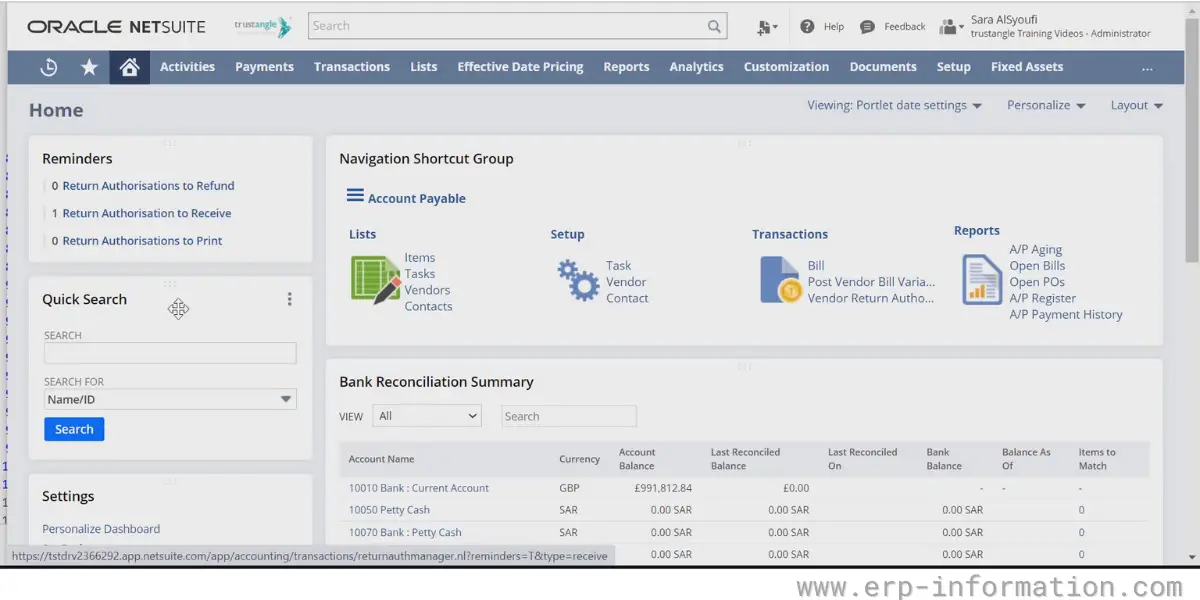
Steps Involved in NetSuite Return Authorization
The image shows the NetSuite RMA process. It includes the following steps.
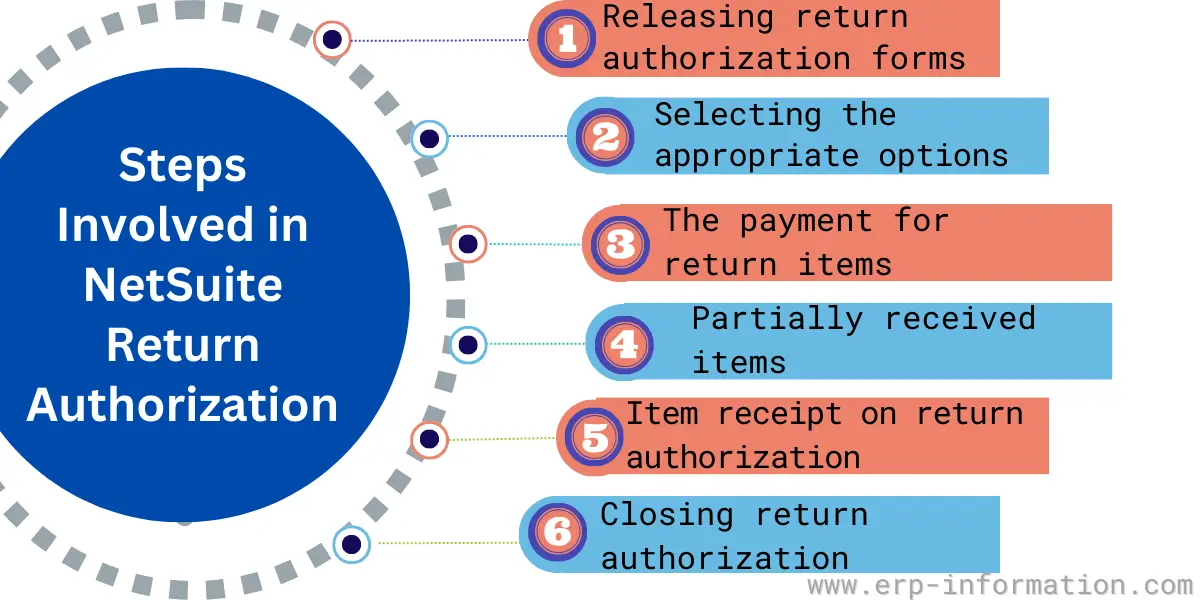
1. Releasing return authorization forms
This step identifies and initiates the return process for items the customer wishes to return.
The form consists of the following information.
- What items are being returned
- How many items are returning
- Cost of items
2. Selecting the appropriate options
There are two options for creating RMA forms.
- Linked return authorization
- RMA can be created in a cash sale, invoice, or sales order. This method auto-fills the form.
- Standalone return authorization
- You need to enter all information using the existing sales transaction record manually.
3. The payment for returned items
It can be done in three ways.
A. RMA forms
There are two types of forms.
| Standard Return Authorization-Credit | Standard Return Authorization-Cash |
| If the customer wants credit instead of cash, the memo for credit is generated. Later it can be deposited into the customer’s account or refunded to the customer. | If the customer wants cash, then direct money is deposited to the customer. But can not be converted to credit. |
B. Refund in advance of return
Some companies enable refunds in advance of a return. In this case, the customer gets a refund before they hand over the item.
C. Advance receiving feature
All RMA forms are processed as credits and refunded to the customer if the advance receiving feature is enabled.
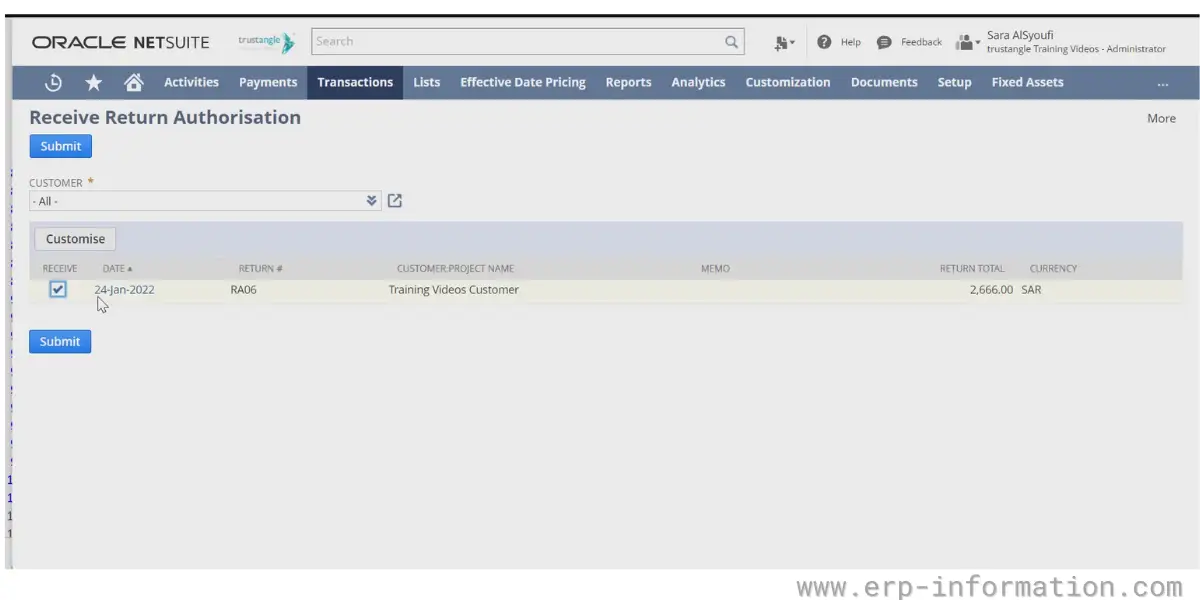
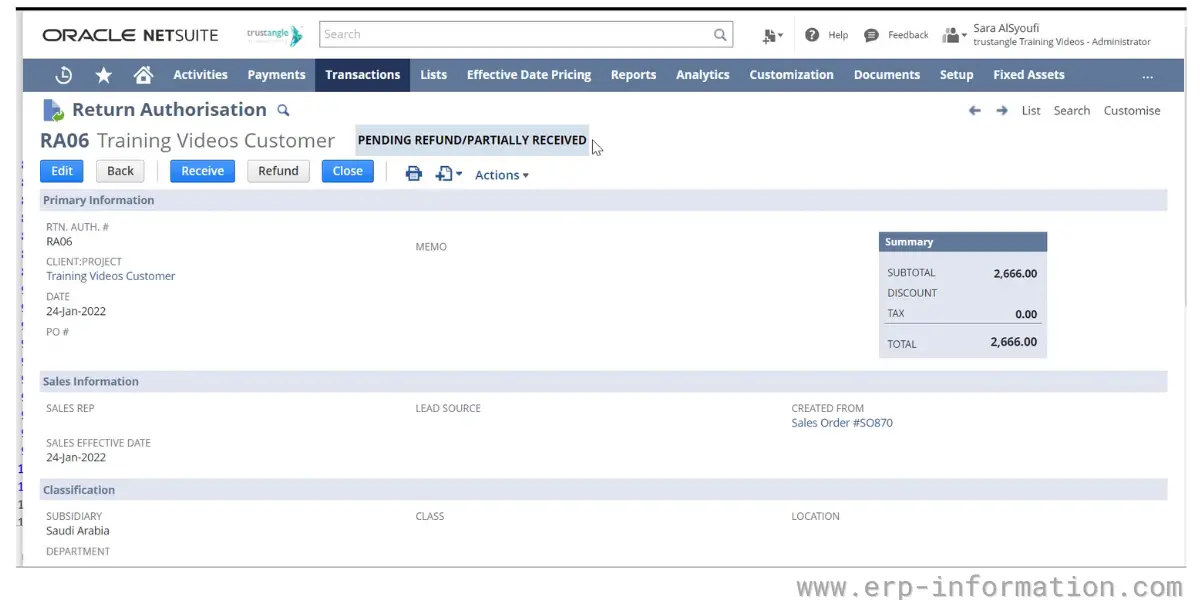
4. Partially received items
There may be a situation where the customer has returned some items but not all. In this case, you have to process the RMA as partially received.
5. Item Receipt
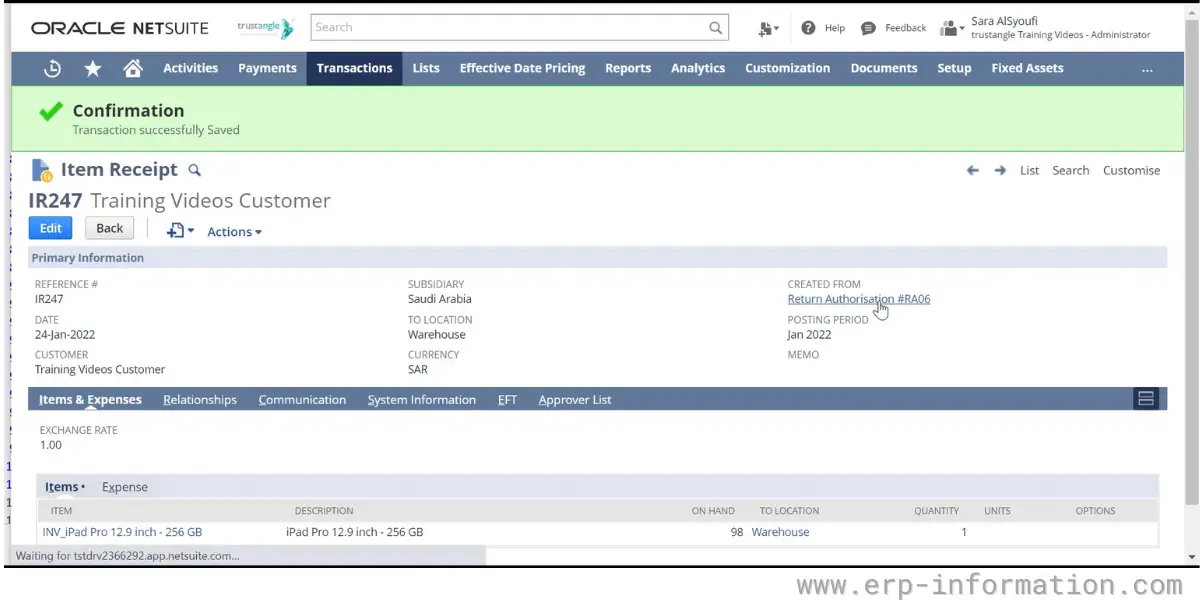
After the customer returns the item, you must process an “Item Receipt” to update the inventory levels.
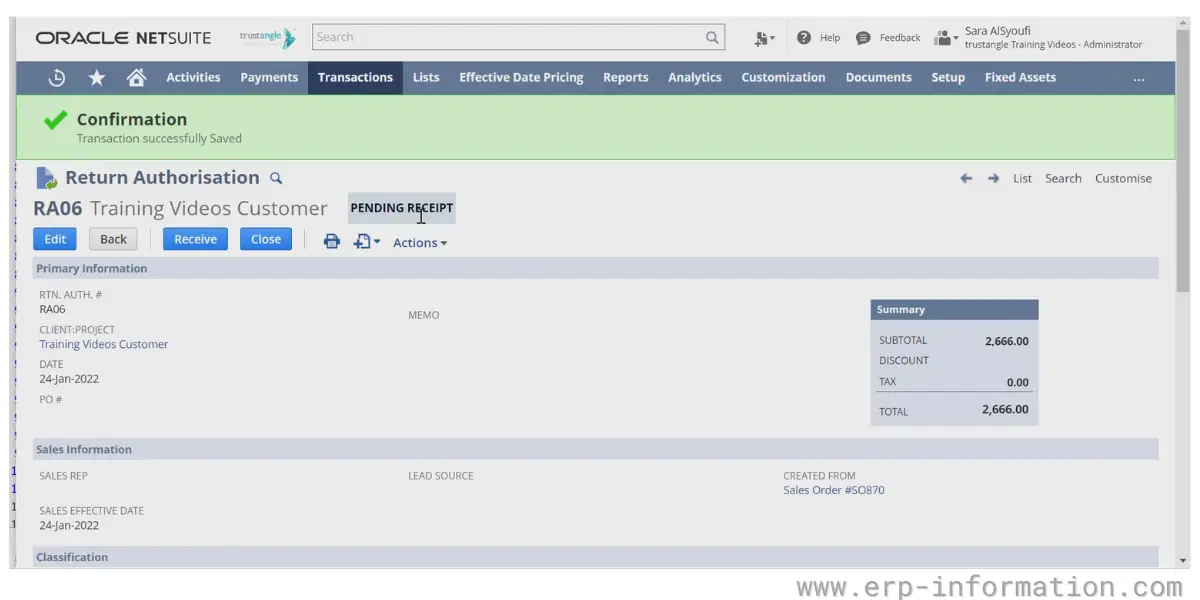
6. Closing return authorization
Once you’ve processed the return, you’ll need to close it.
Returning stock to a supplier follows four steps in NetSuite. The record is non-posting until you fulfill and credit it, so nothing hits your books until the goods actually move.
- Create the vendor return authorization. Enter it from scratch or generate it from the original purchase order so the item, quantity, and cost fill in automatically. NetSuite assigns a unique return number for tracking.
- Approve or cancel it. The record starts as pending approval. Once approved it is ready to fulfill; if it is no longer needed, you cancel it instead.
- Ship the goods back. Fulfilling the authorization creates an Item Fulfillment, which removes the returned quantity from inventory.
- Record the vendor credit. Enter the vendor credit or refund the supplier issues, which offsets what you owe them or returns the cash.
Return behavior is controlled under Setup > Accounting > Preferences > Accounting Preferences, on the Order Management tab in the Returns section. The settings that matter most are:
- Default return authorization status: start new RAs at Pending Approval if a manager should sign off first, or Pending Receipt to go straight to receiving.
- Refund before return: decide whether a refund can be issued before the item is physically back.
- Restocking: set whether returned items go back into sellable inventory by default.
For anything beyond a single approver, a SuiteFlow workflow can route each return authorization to the right person based on return value, reason code, or customer tier, with email and in-system notifications so approvals do not stall. This is where most growing teams go once manual sign-off becomes a bottleneck.
The Benefits
- Keeps inventory accurate: receiving a return posts an Item Receipt that updates stock levels and inventory asset values in real time.
- Full audit trail: the unique return number ties the authorization, item receipt, and credit together, so you can trace any return end to end.
- Faster, cleaner refunds: credits and cash refunds are generated straight from the authorization in the authorized amount, which cuts manual re-keying and errors.
FAQs
What are the challenges businesses face while dealing with returned items?
When businesses deal with returned items, they often face many challenges that can impact their operations and customer satisfaction. Here are some of the most common issues:
Logistical Complexity: Managing returns involves several steps, from receiving the returned item, inspecting its condition, restocking it, and processing the refund or exchange. This process can be logistically complex and time-consuming.
Costs: Returns can be costly for businesses. They have to absorb the shipping costs and potentially lose the profit from the sale. Plus, there may be additional costs for inspecting, restocking, and reselling the item.
Inventory Management: When an item is returned, it must be added to the inventory. That can cause discrepancies in inventory management if not handled correctly, leading to inaccurate stock levels.
Fraudulent Returns: Businesses are susceptible to return fraud, such as wardrobing (where customers purchase products intending to use and return them) or returning stolen merchandise.
Damage or Loss: Returned items may get damaged during transit. Sometimes, items are lost, adding to the cost for the business.
Impact on Sustainability: Managing returns has an environmental impact. It increases carbon footprint due to additional transportation and potential wastage if the product cannot be resold.
Customer Satisfaction: Slow or complicated return processes can lead to customer dissatisfaction and tarnish a company’s reputation.
Resource Intensive: Processing returns can drain resources, requiring dedicated staff and systems, which can be particularly challenging for small businesses.
By adopting a robust return management system like NetSuite’s Return Authorization module, businesses can address many challenges, streamlining their return processes, improving customer satisfaction, and reducing costs.
How long does it take for a return to be processed?
It depends on the product. It can vary from 1 day to 30 days.
RMA does not have a strict time limit, but closing it as soon as possible is advisable.
What do you mean by NetSuite Return Authorization from the case?
If a customer has an issue with a product, they can open a case in NetSuite. From there, you can create a return authorization directly from the point. That will help you keep track of all the details related to the return in one place.
How will I know when my return has been processed?
You will receive an email notification from NetSuite when your return has been processed.
Conclusion
NetSuite’s Return Authorization process gives businesses a controlled way to handle both customer and vendor returns from one system.
You can raise a return authorization on its own, link it to the original sales order or invoice, or start it from a support case, and NetSuite tracks every stage from receipt to refund. Set your approval preferences once and the same process scales from a handful of returns to thousands.
The post provided overall information about NetSuite RMA. We hope you find it informative.
References