It can be tough to keep track of all the moving parts in a business, especially regarding payments.
You need a system that can handle all the different aspects of paying for goods and services. NetSuite’s Procure To Pay Process is designed to make your life easier by automating and streamlining payment procedures.
In this blog post, we’ll dive deep into the Procure To Pay Process NetSuite and how NetSuite can help you streamline it.
What is P2P Process?
The procure-to-pay (P2P) process is the sequence of activities businesses follow to procure and pay for goods and services. The process typically involves identifying needs, requesting goods or services, receiving and inspecting goods or services, and approving and paying invoices.
While the P2P process may seem straightforward, it can be complex and time-consuming for large businesses. Manual P2P processes can be prone to errors and inefficiencies, such as duplicate payments, lost invoices, and late payments.
What is the Procure to Pay Process NetSuite?
NetSuite is a cloud-based enterprise resource planning system that helps businesses automate and streamline their P2P processes. NetSuite provides a comprehensive suite of tools for managing the entire P2P lifecycle, from purchase requisitions to vendor payments.
Procure to pay cycle in NetSuite is the sequence of activities that must take place to procure and pay for goods and services.
NetSuite P2P process typically starts with creating a purchase order and then sending it to the supplier. The supplier then sends a confirmation, and the order is processed and paid for.
Procure to pay process flow in NetSuite

Steps Involved in NetSuite P2P
The Procure to Pay process in NetSuite is an eight-step process that helps businesses manage and track their spending. The steps involved are:
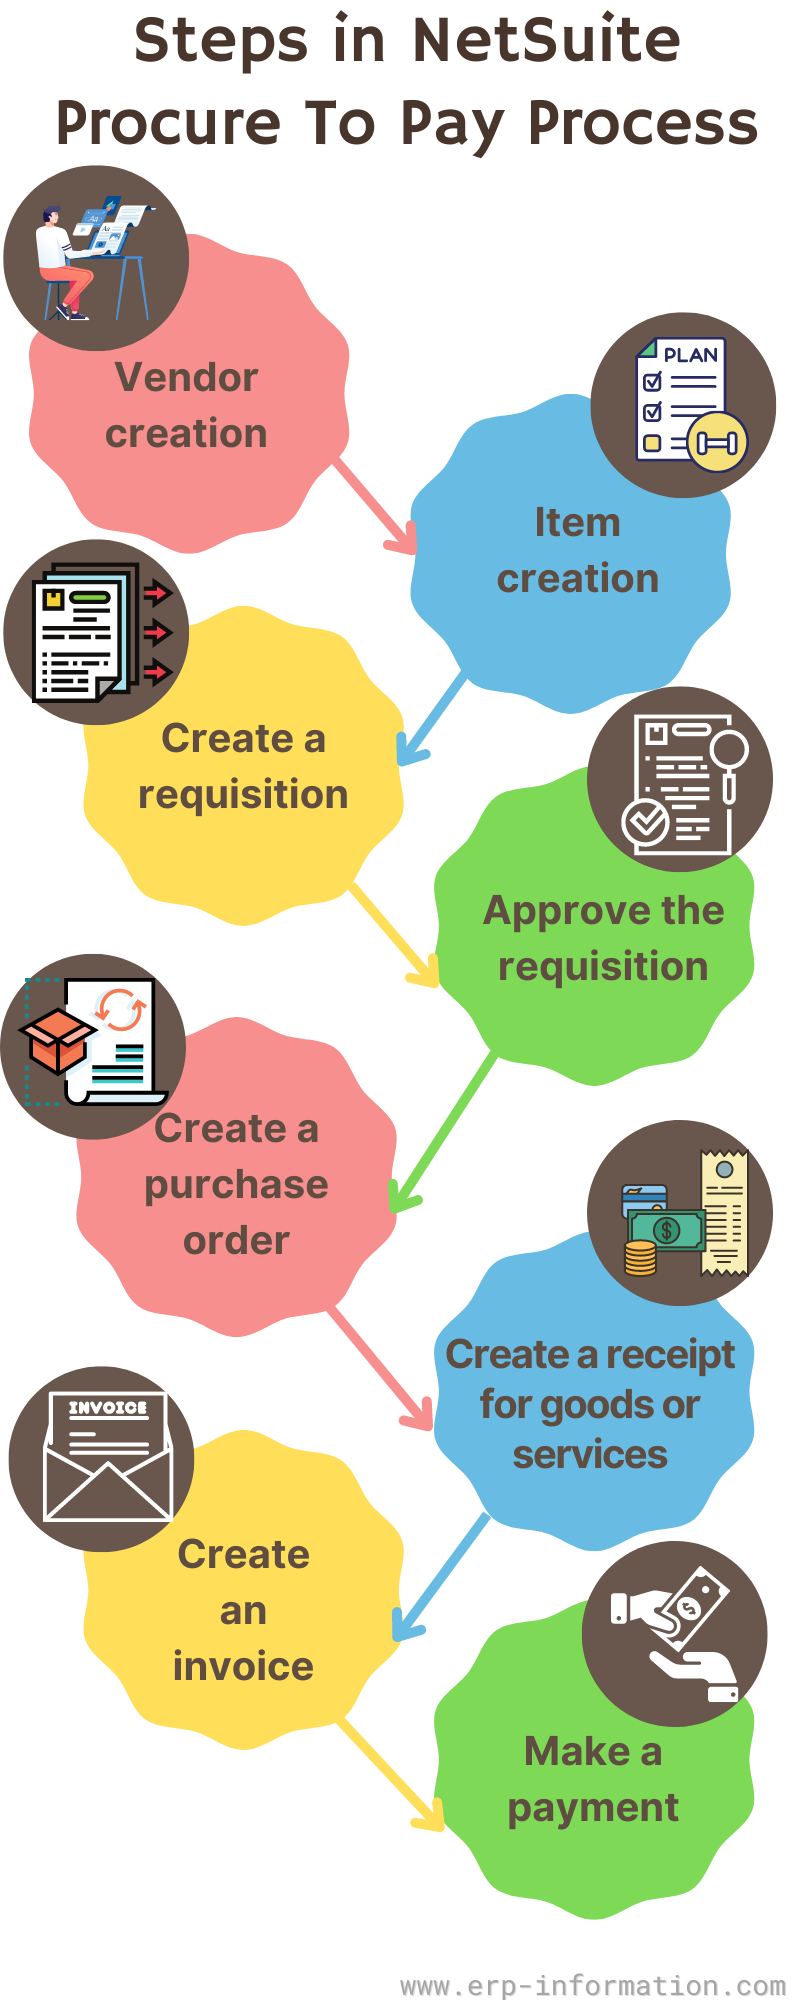
Vendor creation
To create a vendor in NetSuite, you must go to the Purchasing tab and click on Vendors. Then, click the” New Vendor” button and fill out the required information.
Lists>relationship > Vendor> new
Click here for our Vendor Rating cost ratio Calculator
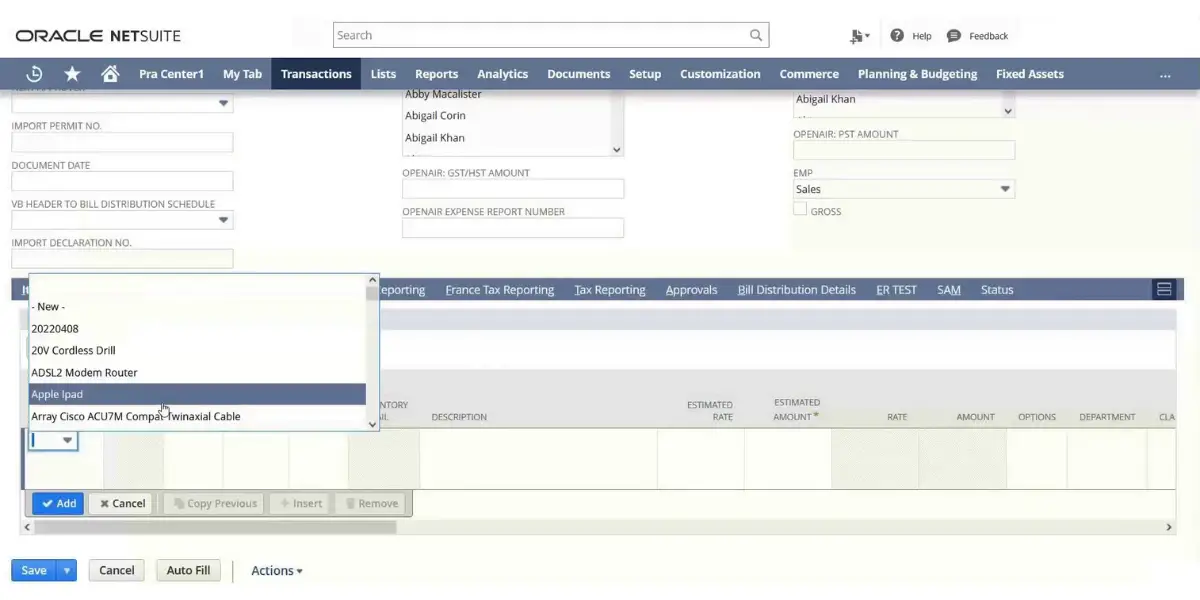
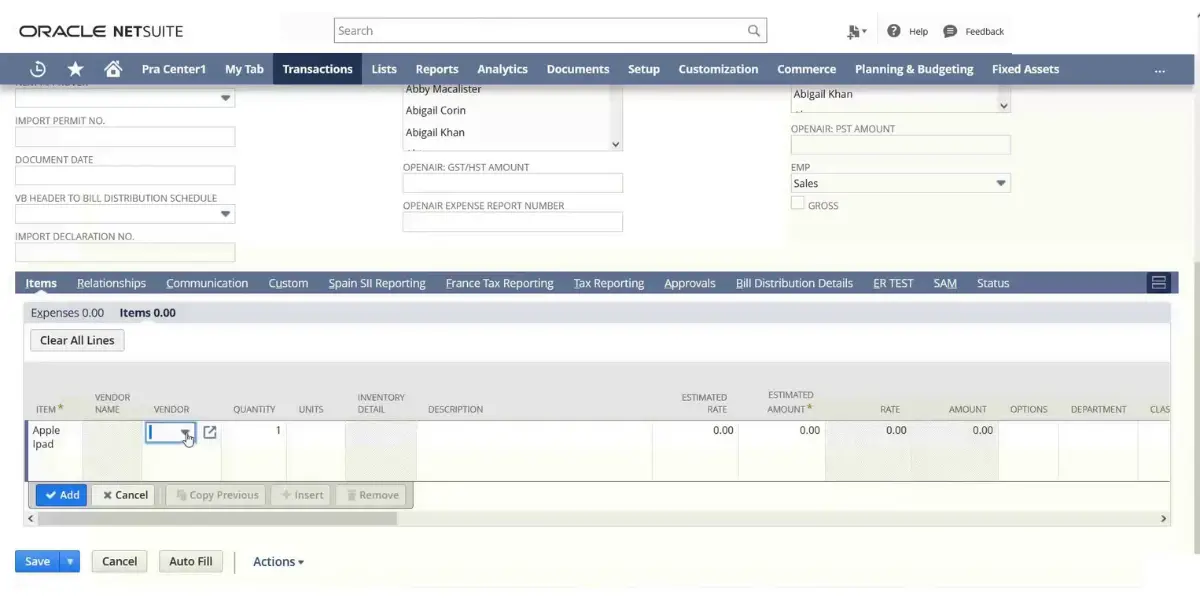
Item creation
To create an item in NetSuite, go to the list and select items. You will then need to provide a name for the item. After that, you can add more details about the item, such as a description, pricing, and supplier information.
List > Accounting> Items>New> Non inventory>Purchase
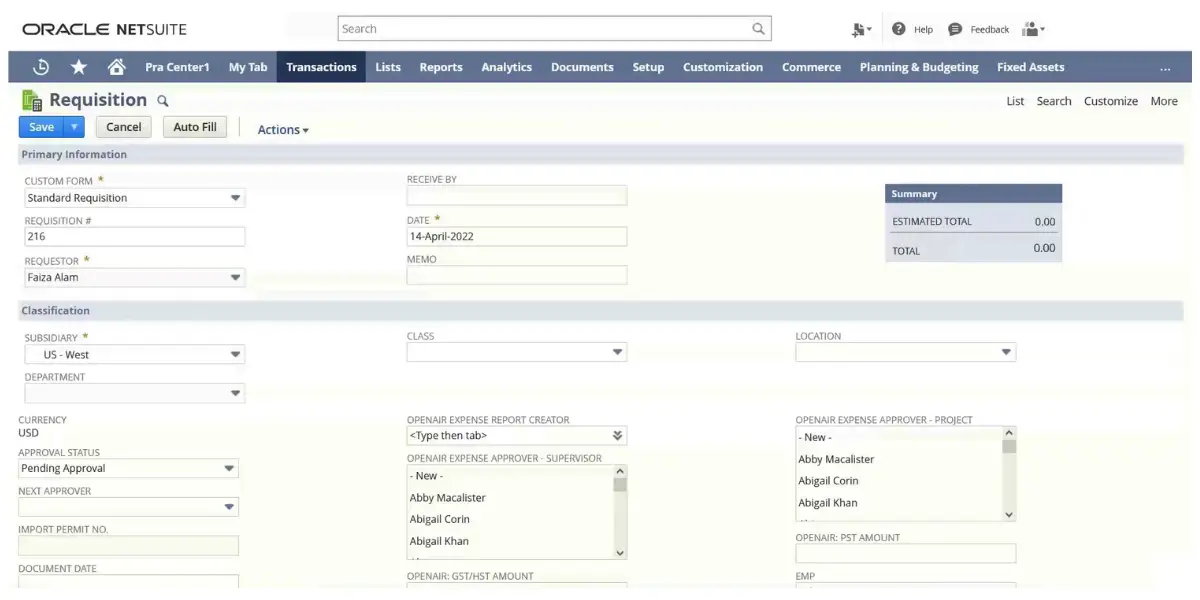
Create a requisition
A purchase requisition is a request for goods or services from a supplier. This can be done by going to “Transactions” and clicking on the” Requisition” button. Next, enter the vendor information, such as the vendor’s name, address, and contact information.
Then choose the items you want to purchase and enter each item’s quantity and unit price. Finally, choose the payment terms and submit the requisition.
Transactions>Purchases>Enter Requisition>New
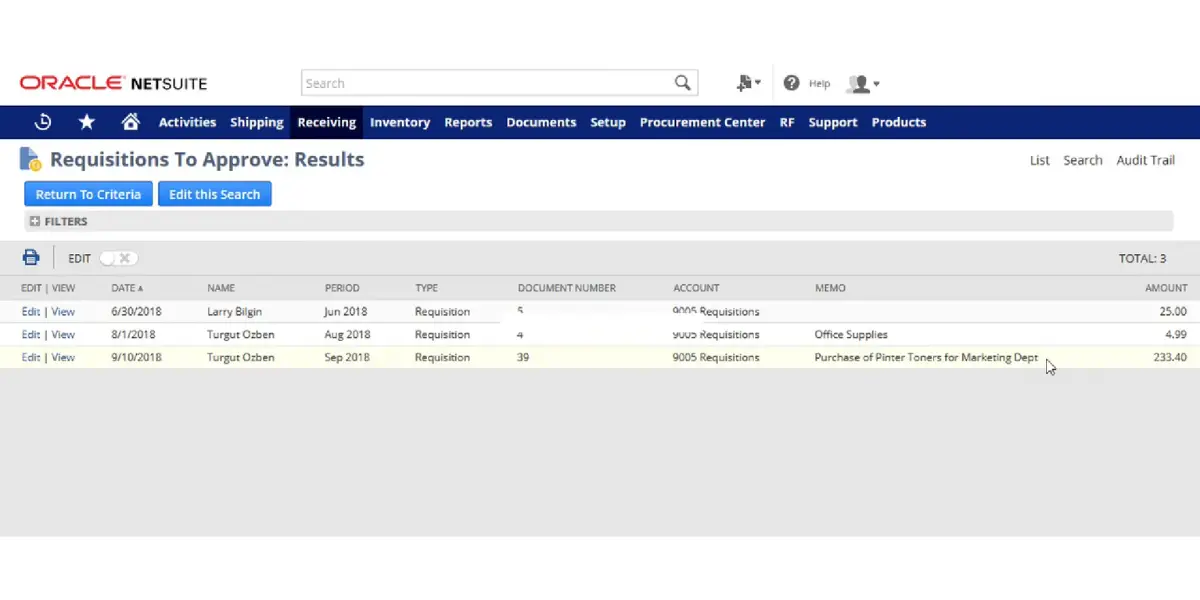
Approve the requisition
The requisition will need to be approved by a supervisor or manager. To do this, go to “Transactions” and then click on the “Requisition” button. Next, find the requisition you want to approve and click the “Approve” button.
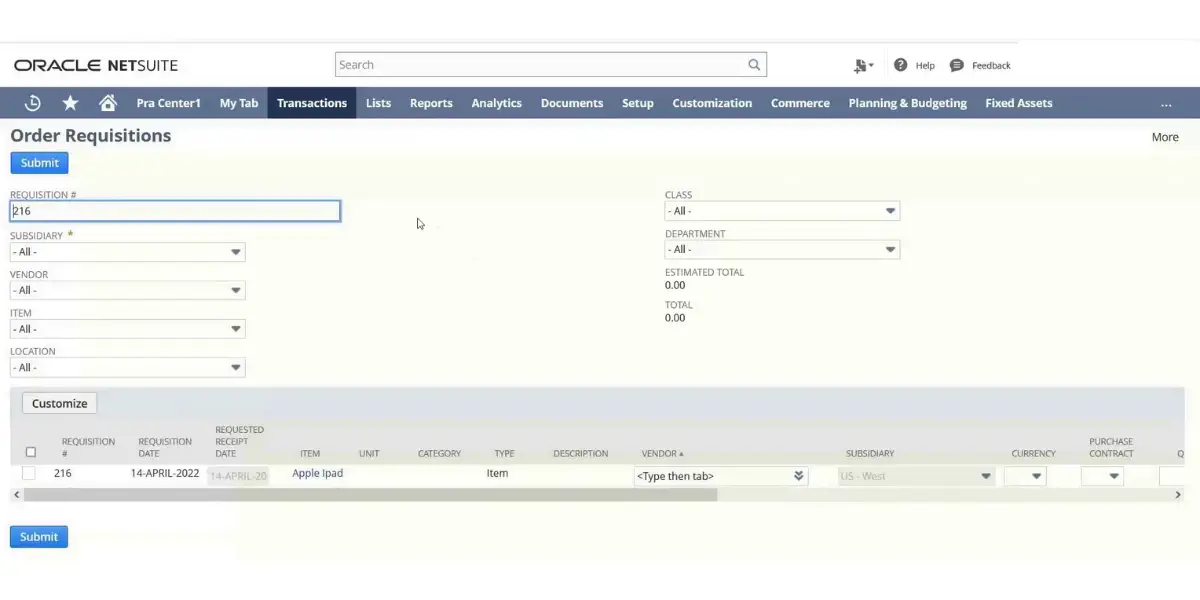
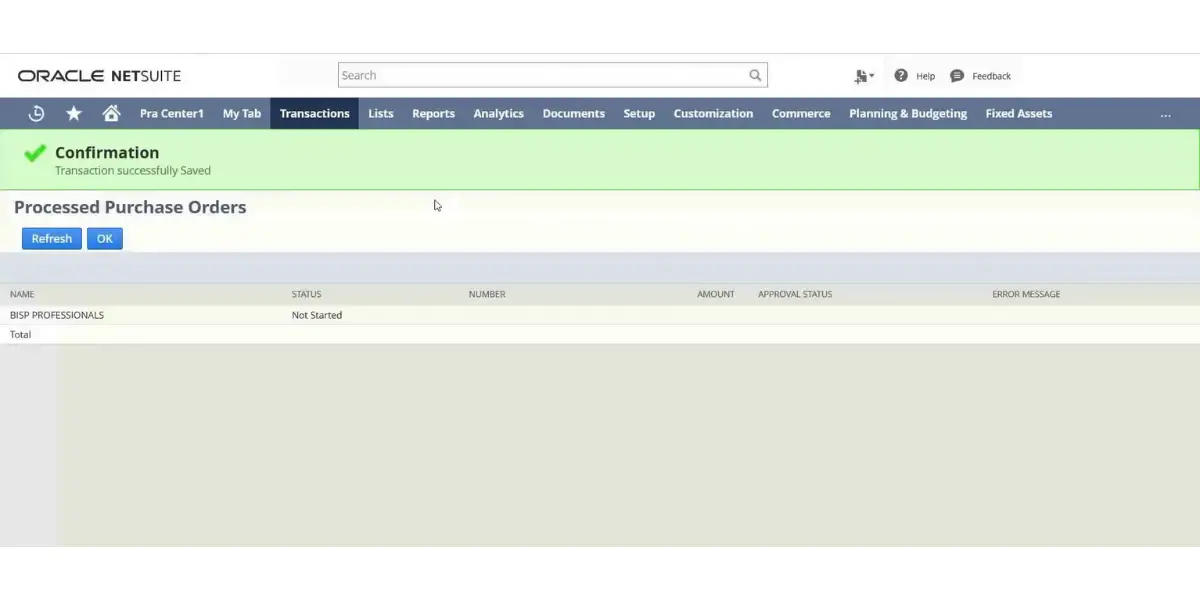
Create a purchase order
Once the requisition has been approved, you can create a purchase order. A purchase order is an official document to a supplier detailing the ordered goods or services. To do this, go to “Transactions” and click on the “Purchase Order” button.
Transactions>Purchase>Enter Purchase Order>List
Enter the vendor information and choose the items that you want to purchase. Enter the quantity and unit price for each item. Choose the ship-to address and the delivery date. Submit the purchase order.
Click here for a free, online Purchase Order Finance Calculator and Purchase Price Variance Calculator
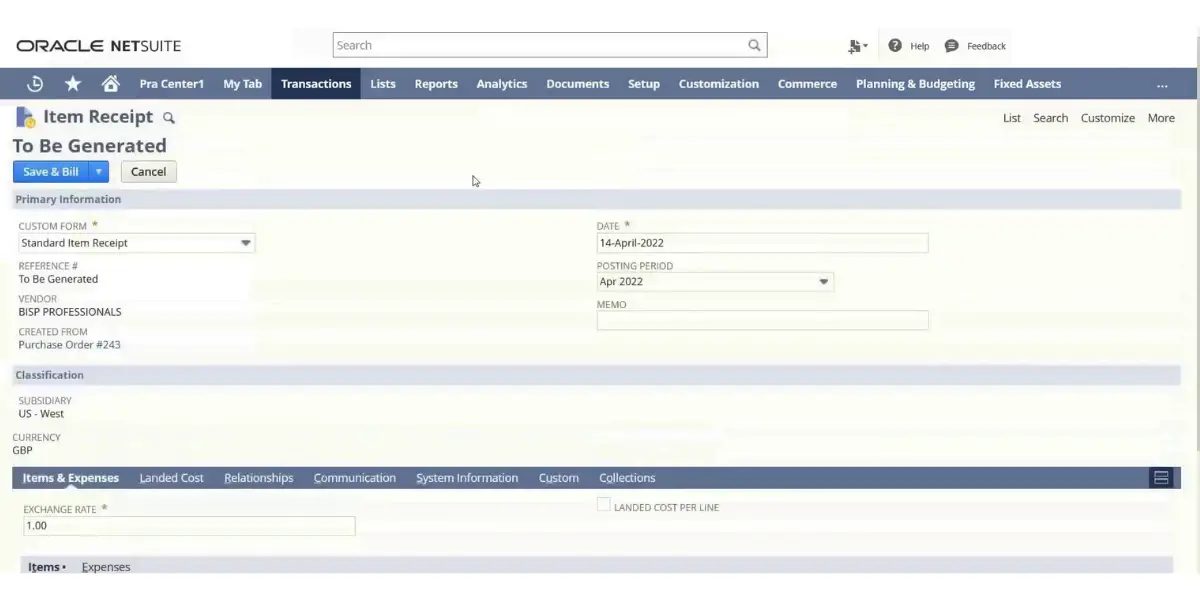
Create a receipt for goods or services
Once the goods or services have been received, you must create a receipt. Go to “Transactions” and click on the “Receipt” button.
Enter the vendor information and choose the items that you have received. Enter the quantity and unit price for each item. Choose the ship-to address and the delivery date. Submit the receipt.
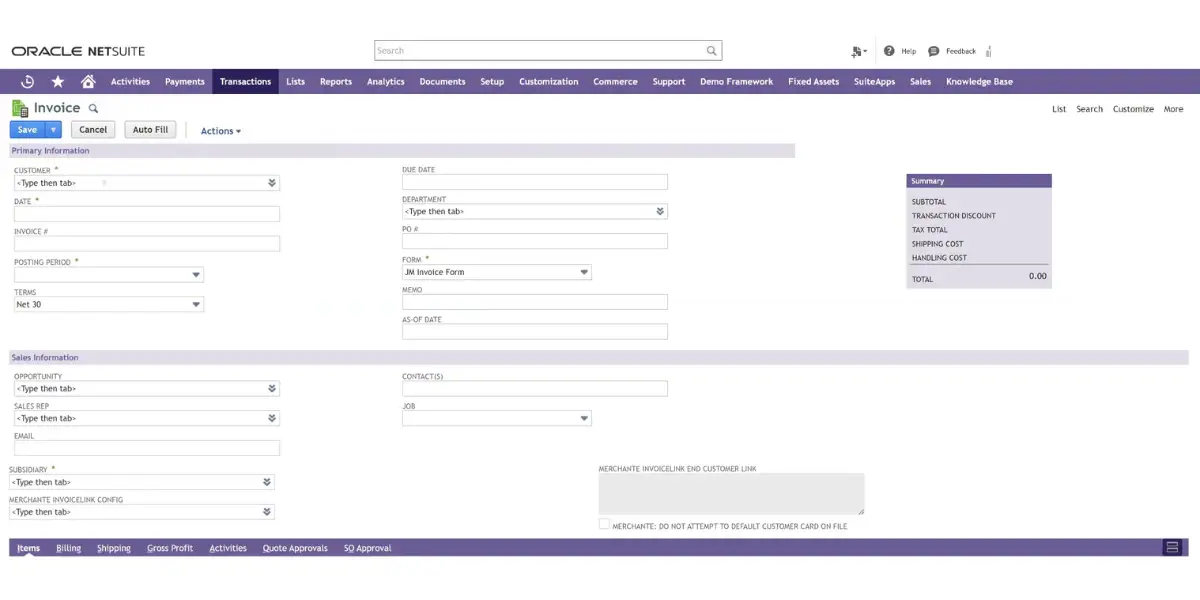
Create an invoice
After receiving the goods, you will need to create an invoice. To do this, go to “Transactions” and click on the” Invoice” button.
Enter the vendor information, the purchase order number, and the date of the invoice. Next, choose the items you want to include on the invoice and enter each item’s quantity and unit price. Finally, select the terms of payment and submit the invoice.
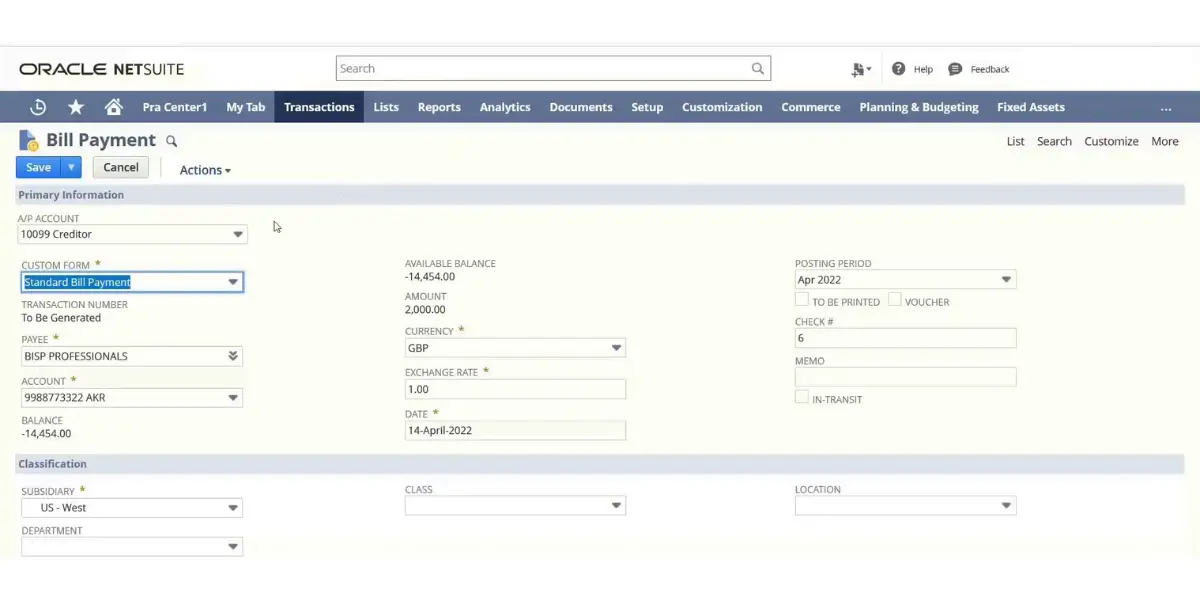
Make a Payment
Once the invoice has been paid, the payment will need to be entered into NetSuite. To do this, go to “Transactions” and click on the” Payments” button.
Find the payment you want to enter and click the “Details” button. Then, enter the information about the payment and submit the payment. The accounts payable feature in NetSuite will take care of this step.
The Benefits of Using NetSuite for the Procure to Pay Process
The benefits include:
- A centralized system that can be used to track all spending
- Easy-to-use interface
- Helps businesses manage their cash flow
- Companies can use it to track purchase orders, invoices, and payments
- Can help companies save money by getting discounts from suppliers
- It helps businesses stay organized and efficient
FAQs
Why procure to pay is important?
Procure-to-pay (P2P) is important because it is the process by which businesses acquire the goods and services they need to operate and grow. It is a critical part of the supply chain and can significantly impact the bottom line.
It is important to cost saving, improve efficiency, reduce risk, increase visibility, and good supplier relationships.
Conclusion
NetSuite’s Procure to Pay process is a detailed illustration of the entire procurement cycle. This article explains each process step and how it works.
Companies can streamline their purchasing procedures and improve their bottom line by understanding the Procure to Pay process.